So, I am on time with my post this week, however I am slightly behind with my work. I expected to have the legs positioned and start work on the arms but due to having to go Carpet shopping, and other house issues, I am only half way through the legs. Get ready for a picture heavy and word light post!
This is where we were up to last week, the model was sat ready to be hacked and chopped with a wealth of ideas ready to be tested. Chopped and hacked he was, I really regret using Black Reach Terminators, but, I made some headway and I hope with some Greenstuffing they will look decent by the end.
The first thing I did was slice his legs off at the knee joint, I made the effort to cut from the back halfway through so that the cut would go through the flexible joint area, to keep the aesthetics, I then cut down from the back of the raised knee pad creating a rough L cut.
I then drilled holes in both Shins and Thighs for the pin (paperclip) to be put it giving me easy dry runs to get the leg positioning right.
I then straightened out one of my 100 paperclips ready to cut and use as pins...
and then I used my cutters to cut two lengths of paperclip to roughly half an inch, and then had to cut them down again and again because they were too long, but its always better to have too much and cut down than not have enough and start again.
Here you can see the pins being ready to use for their first dry run, and its obvious how the pins are too long, I cut them down a couple of millimeters at a time until I felt they were the right length.
I then realised that I hadn't positioned the top of the leg for a kneeling position... thankfully I hadn't glued anything yet, and spent about 20 minutes slicing through the hip joint, I had to trim the leg down on the inner thigh so that it would point straight forwards instead of at an angle. I then re-glued it into position (which put me behind a bit).
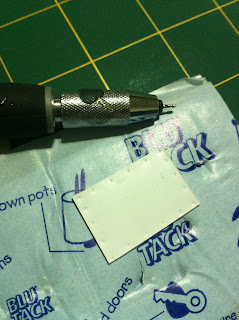
While the glue was drying I decided to try my hand at making rivets for the outside of Vorenus' Storm Shield. I pushed the drill bit right down into the pin vice leaving just the tip showing, then cut the plasticard to shape and placed it onto the un-opened blu-tack (like modelling clay). I then pushed quite hard in a set pattern (starting with each corner then at regular intivals) leaving me with indents like above...
and the front looked like this (not the best picture but I am using my phone). This gives me the basis of the storm shield, and should be easy enough to finish now. This week I will finish positioning the legs, and I hope to start work on the sword arm.
Stay tuned, and feel free to let me know any tips or tricks I might have missed.


No comments:
Post a Comment